Keyboard shortcuts and the command palette
Draft Canvas is built so you can draw without leaving the keyboard: a letter drops a shape, the
palette does the rest. This guide covers the moves worth learning first. For the complete list,
press ? in the editor.
Shortcuts are written for a Mac. On Windows and Linux, read ⌘ as Ctrl and ⌥ as Alt.
Single-letter shortcuts only work when the canvas has focus, not while you're typing in a field or
when a dialog is open.
The two things to remember#
?opens the shortcut sheet, with a filter box. It is built from the same list the app uses, and tests check the two agree.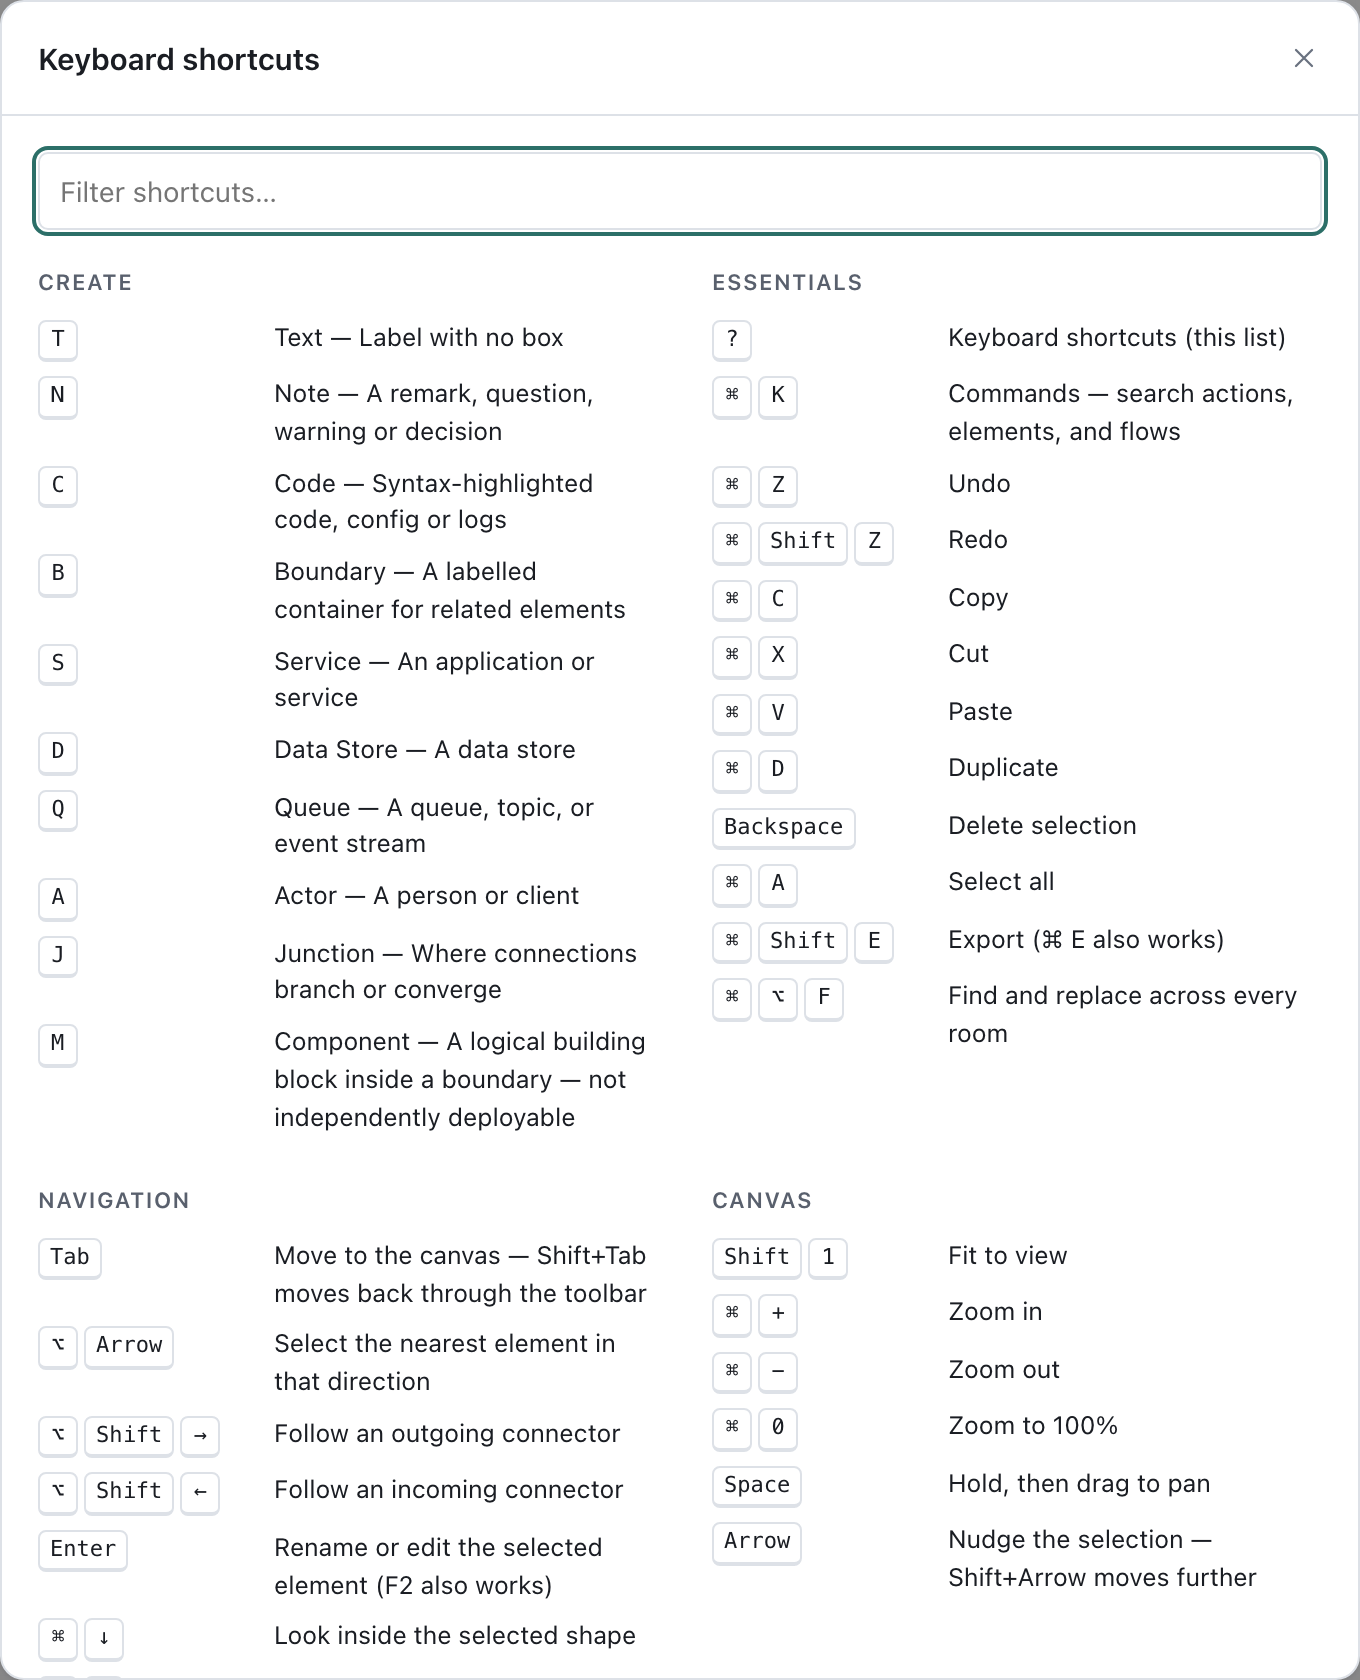
⌘Kopens the command palette. Type part of a name and pressEnter. Everything you can do from a menu is in there.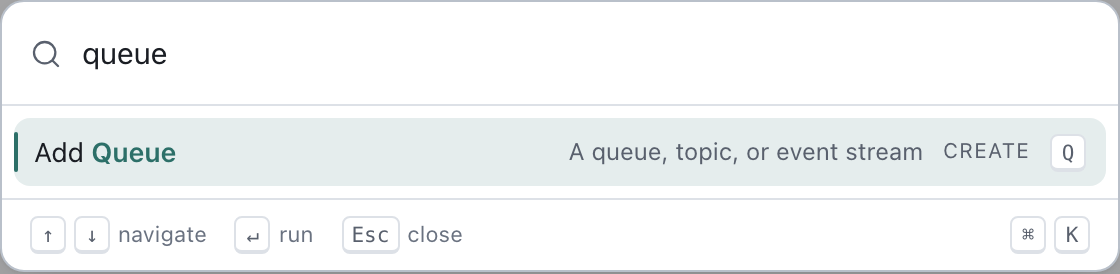
Draw without the mouse#
Press a letter and the shape appears under your pointer, ready to type its name. If the pointer hasn't moved over the canvas, it appears next to the selected shape, or in the middle of the view.
| Key | Adds | Key | Adds | |
|---|---|---|---|---|
S |
Service | N |
Note | |
D |
Data Store | C |
Code | |
Q |
Queue | T |
Text | |
A |
Actor | B |
Boundary | |
M |
Component | J |
Junction |
To connect two shapes, drag from one shape's handle onto another. Dropping on empty canvas opens a
short menu of shapes to create and wire up in one move. A shape made that way is selected but not yet
being named, so press Enter to type its name. Prefer the keyboard? Select a shape, press
⌘K, choose Connect to…, then pick an existing shape or a new one.
Take the suggestion#
When you select a shape, Draft Canvas sometimes shows a faint ghost of the likeliest next shape and connector, for instance a Worker after a Queue. It only suggests when the diagram gives it a reason, and it stays quiet otherwise.
| Key | Does |
|---|---|
Tab |
Accept the ghost |
] / [ |
Show the next or previous alternative, or ask for one when nothing is showing |
Esc |
Dismiss it |
Some shapes have no suggestion on purpose. A Table could be an outbox, a read model or plain
business data, and nothing in the diagram says which. Pressing ] on one opens the add-element menu
beside it instead, with a line saying why. Pick a shape with the arrow keys and Enter to add it and
connect it in one move.
Suggestions are on by default. Turn off Intent Continuation in the palette switches them off, and the same command turns them back on.
Move around#
| Keys | Does |
|---|---|
⌥ + arrow |
Select the nearest shape in that direction |
⌥⇧→ / ⌥⇧← |
Follow an outgoing or incoming connector from the selected shape |
| Arrow keys | Nudge the selection 1 unit; with Shift, 10 |
⇧1 |
Fit the whole diagram in view |
⌘+ / ⌘− / ⌘0 |
Zoom in, zoom out, zoom to 100% |
Space + drag |
Pan (the mouse wheel and trackpad scroll pan too) |
⌘↓ / ⌘↑ |
Look inside a shape, and back out. See Explain a system at different levels. |
To find something by name, press ⌘K and start typing: named shapes, flows and labelled connectors
all appear as Jump to results. Choosing one selects it and moves the view to it.
Edit#
| Keys | Does |
|---|---|
Enter |
Edit the selected shape's or connector's text (a Boundary's caption too) |
Esc |
Step back one level: editing, then popovers, then the selection |
⌘Z / ⌘⇧Z |
Undo / redo |
⌘C ⌘X ⌘V |
Copy, cut, paste. Pasting works between diagrams |
⌘D |
Duplicate |
Delete or Backspace |
Delete the selection |
⌘A |
Select all shapes |
⌘G / ⌘⇧G |
Group into a Boundary / ungroup |
⌘B / ⌘I |
Bold / italic, for a selected Text shape |
⌘⌥F (Ctrl+H on Windows and Linux) |
Find and replace, across every shape, connector, note and flow in every room — one undo step |
While you type, Enter commits a shape's label and Shift+Enter adds a line. Notes work the other
way round: Enter adds a line and ⌘Enter commits. In a Code shape, Enter is always a new line.
Esc keeps what you typed in a Note and discards it elsewhere. On a Boundary, Enter edits its
caption.
Shift+F10 (or the Menu key) opens the context menu for the selection, the keyboard route to the
same actions as a right-click.
The Outline, and what a screen reader hears#
⌥O (or Outline in the palette) docks a list of the current view beside the canvas: every shape in
reading order, boundaries holding their members, and under each shape the connectors that touch it
("→ Orders: writes to"). It is the same selection as the canvas, both ways: arrow through the list and
the canvas selects along with you, panning a shape into view if it was off screen; click a shape on the
canvas and its row lights up. → and ← fold and unfold a shape's connectors or a boundary's members,
Enter edits the row's element exactly as it does on the canvas, Esc closes the list and puts focus
back on the canvas.
Every shape has a name a screen reader can read ("Orders API, service") and every connector is read as a sentence in the arrow's direction ("Orders API writes to Orders") — the same words the canvas captions it with. Selecting something announces it once the selection settles ("Orders API, service, 2 connectors"; "3 elements selected"), so arrowing through a diagram speaks where you land, not every step on the way.
On a touch screen, a tap selects, a finger held still for half a second opens the same menu a right-click does, and two fingers zoom.
What the command palette does#
Open it with ⌘K, or from Commands in the toolbar. With nothing typed, it shows the commands
you used lately, then what applies to the current selection, then everything else, grouped:
- Selection and Connector: the actions for whatever you have selected, such as Connect to…, Look inside, Make asynchronous, Reverse direction or Add to flow….
- Create: Add Service, Add Queue and the rest, each showing its letter.
- Architectures, Data Architectures and Patterns: starters that fill a blank canvas with a composed, editable architecture (Monolith, Microservices, CQRS, Saga, Outbox and others).
- Flows and Open points: start a presentation, add a flow, raise a point about the selection, open the list of what is still unsettled.
- View and Canvas: fit and zoom, View level…, Tidy connectors, Arrange diagram (lays the current view out again as one undo step, keeping every connector, note, flow and the selection), Find and replace…, Export…, Canvas settings…, Keyboard shortcuts, and Open the documentation.
Typing also searches the diagram itself: every named shape, labelled connector and flow is a Jump to row, in every room of the file — a row from inside another shape says so ("inside Orders API") and takes you there first.
Typing narrows the list with a forgiving match: svc finds Add Service. A few commands ask a
follow-up question in a second list, such as Connect to… or View level…; Esc steps back.
If nothing matches, the list says so.
The palette only names things the app already does. Anything you can pick in it, you can also do with a shortcut or the mouse, and it is a good way to discover what exists.
While presenting#
⌘Enter, the Present button in the toolbar, and Start presentation in the palette all do the
same thing: open the flow — its title beside its whole path — and wait for you to begin. Press
⌘Enter again to leave.
Presenting is read-only. → or Space moves forward: it begins the story from the opening, goes to
the next step, and past the last step closes on the whole path, then on to the next flow. ← goes
back the same way, to the opening from step 1. Home and End jump to the first and last step, and
a digit 1–9 jumps straight to that step; the marks on the control strip do the same with a
click. Esc leaves. ⌘K still works, and shows only presentation commands. I still opens the
line for capturing an action.
The camera is directed: it holds still while the next step already reads, slides a little when it
has to, and cuts to a new composition only for a long handoff. O is Overview — the whole flow,
keeping your step; O again returns. Panning or zooming by hand stops the camera following the
story; R (Re-centre) hands it back. P toggles the pointer, a soft ring that follows the
cursor. The control strip recedes while nothing moves and comes back on any movement or key.
With more than one flow, you can move between them without leaving the presentation — which is what
makes it possible to follow a question from the room and carry on. Shift+→ starts the next flow,
Shift+← the previous one, and Shift+F opens the list so you can jump straight to any of them.
The bar's title (Payment processing · Flow 2 of 4) opens the same list with a click. Flows run in
the order the Flows panel lists them and never loop back round: at the last step of the last flow
the bar simply says End.
Only a flow with at least one step can be presented, so the count is over the flows you can actually reach — a document with five flows, two of them still empty, presents three.
Leaving puts the editor back where you left it: the same view, and the same shape selected. See Getting started.
Where the rest is#
Keyboard shortcuts (?, or the toolbar's More menu) lists every key the editor answers to, with a
filter. The other guides in the documentation index are the longer walkthroughs: shapes,
connectors and boundaries; flows and presenting; depth; open points; saving and sharing.