Getting started
In a few minutes you'll draw a small system, annotate it, walk someone through it, and export it. The system is an API that puts orders on a queue for a worker to process.
You need the app open: the hosted version, a Docker copy, or the desktop app. Nothing here needs an account, and nothing you draw leaves your machine.
Shortcuts are written for a Mac. On Windows and Linux, read ⌘ as Ctrl.
Start a canvas#
On the first visit, choose New canvas (pressing Enter also works). Later, the same New
canvas button is at the top of the Library, the list of your saved diagrams. Your diagram
saves itself as you work; see Saving, backing up and sharing.
Draw Service → Queue → Worker#
Add the service. Move your pointer over the canvas and press
S. A Service appears under it, ready to type. TypeOrders APIand pressEnter.Add the queue. Select the service and drag from one of the small dots on its edge (its handles) into empty space, then let go. A short menu offers Service, Data Store, Queue and Actor. Choose Queue, press
Enterto name it, and typeorders.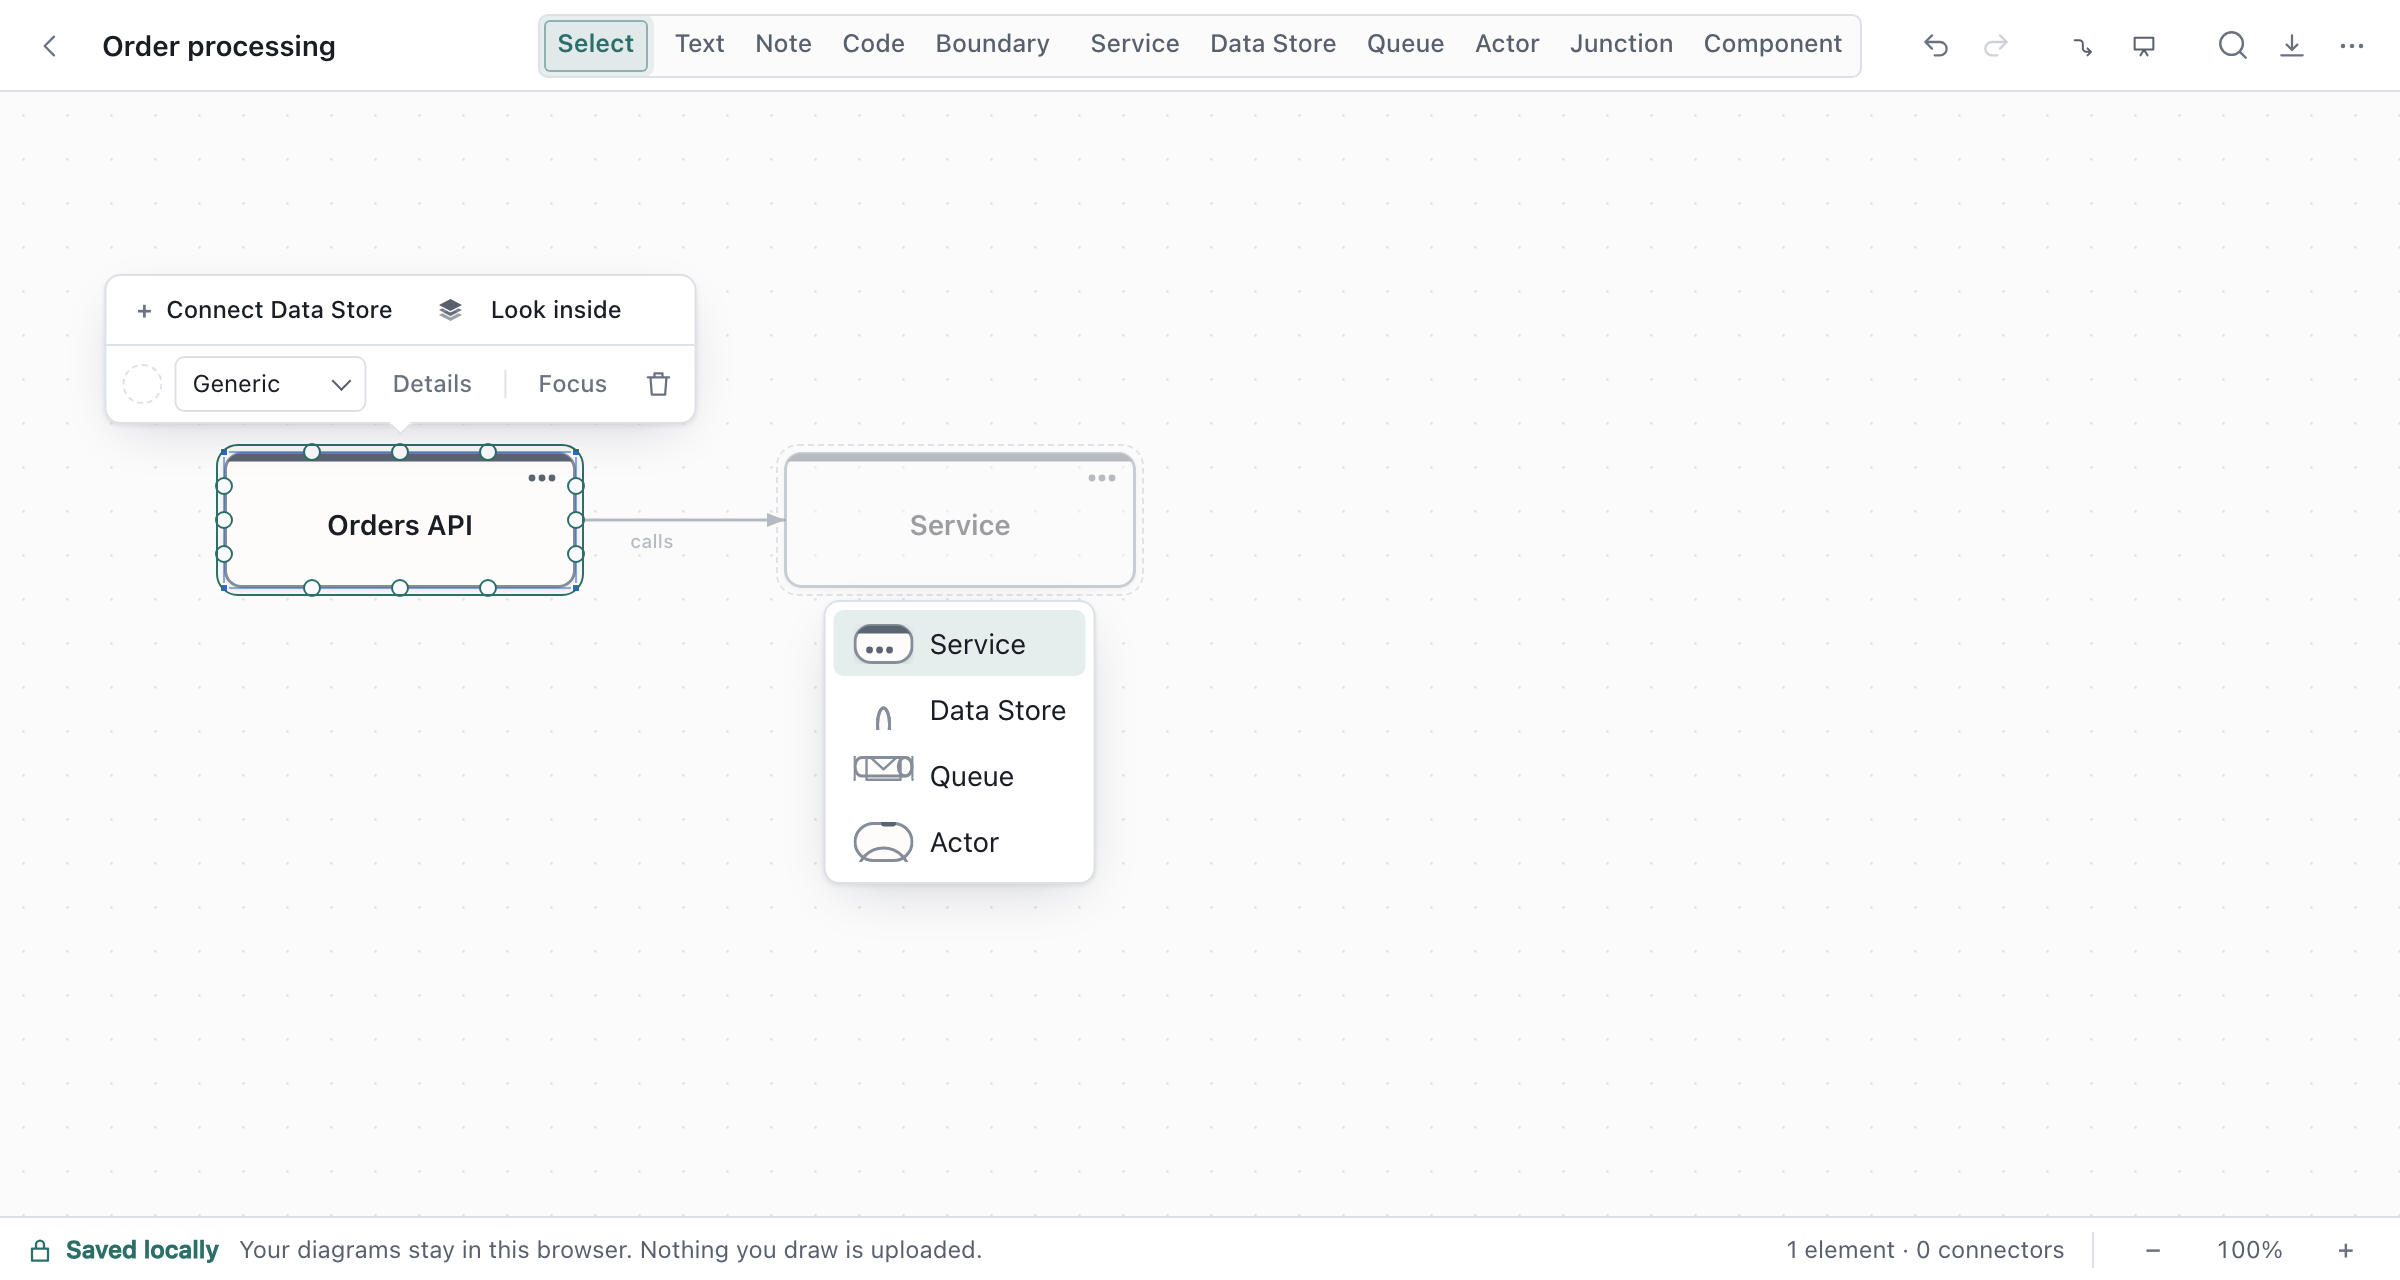
Take the suggestion. With the queue selected, a faint Worker appears beside it, connected. That is Draft Canvas guessing your next move from what you've drawn. Press
Tabto accept it, thenEnterto name itFulfilment worker. If the guess isn't what you want, pressEsc, or]to see another.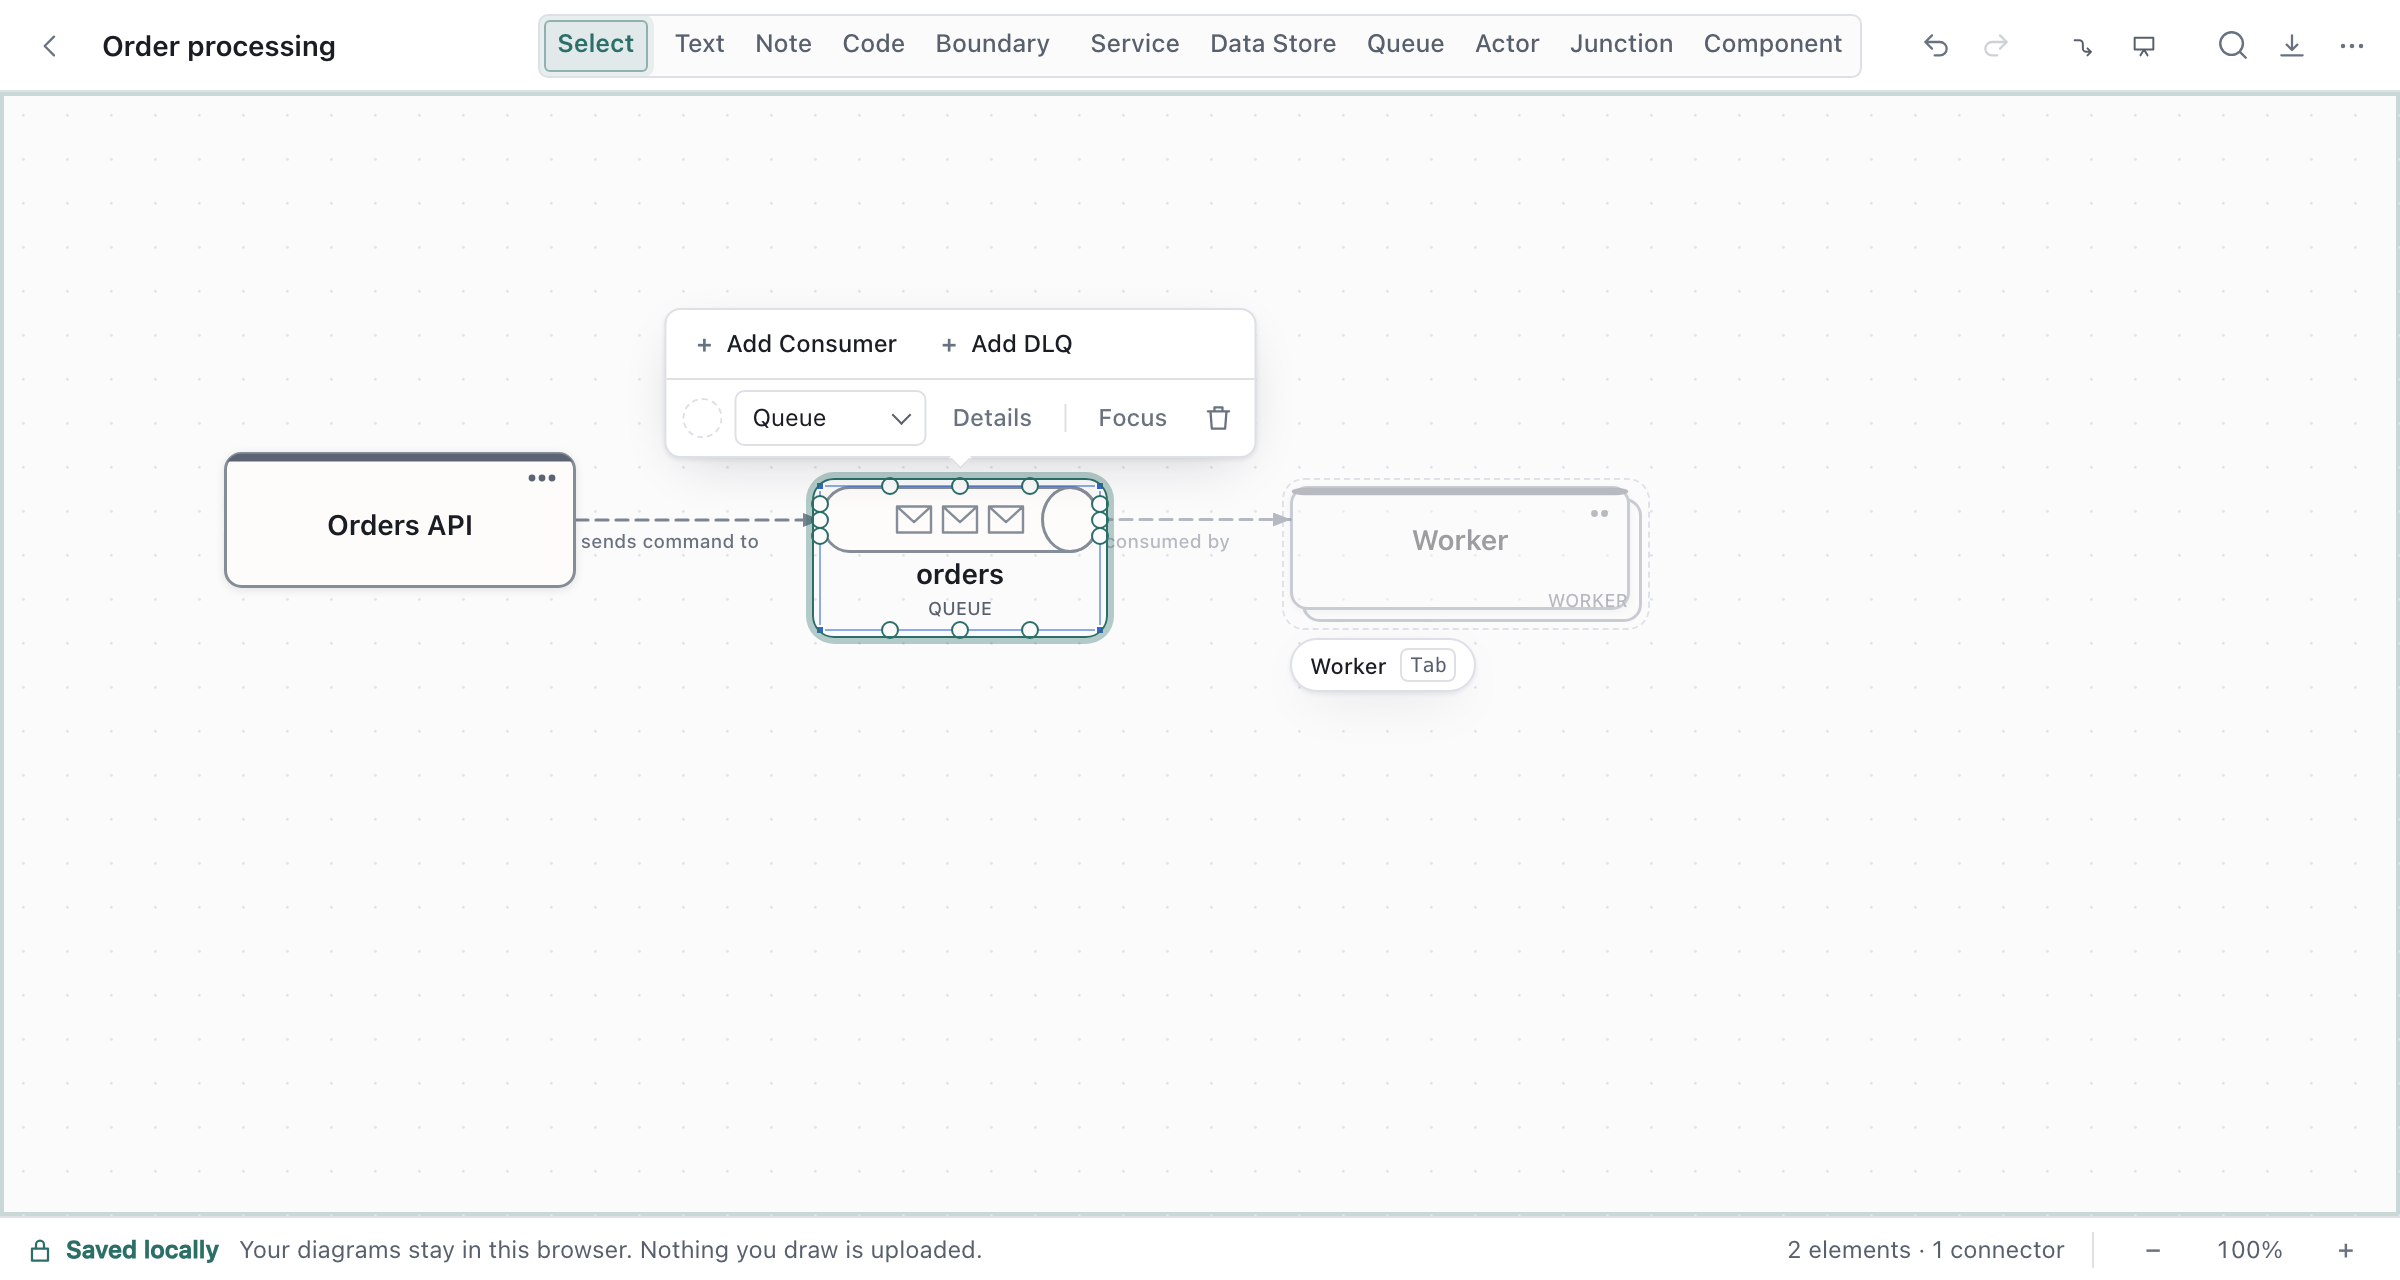
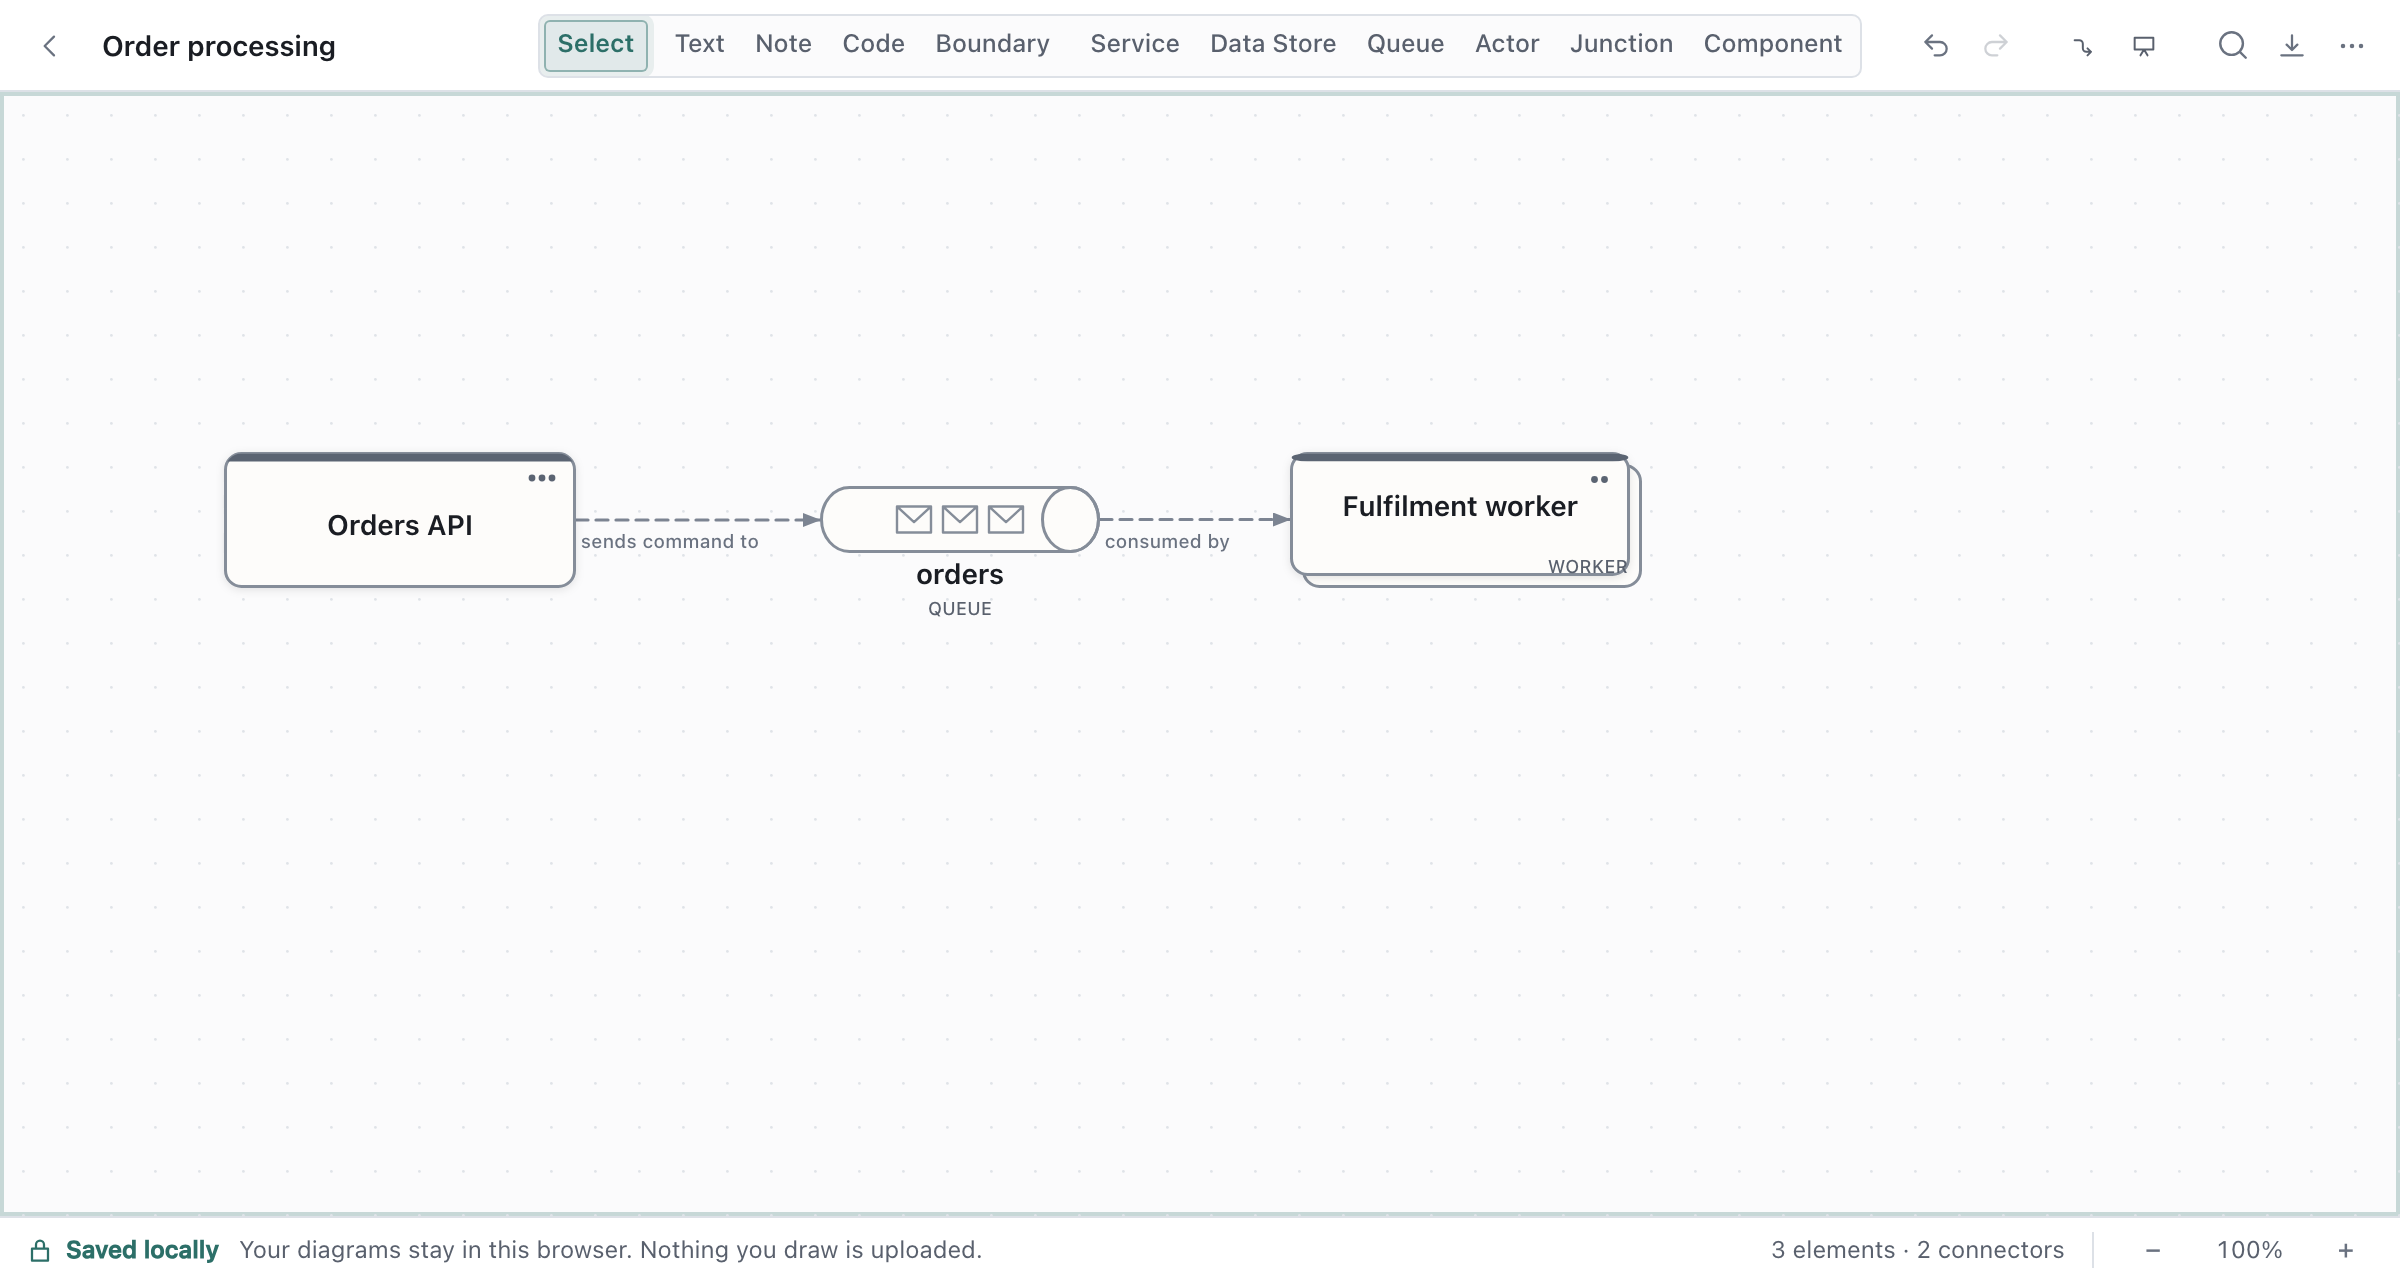
The connectors have labelled themselves with what they mean. The line from the API to the queue says it sends command to it — a job handed off, drawn dashed because nothing waits for it — and reads in the direction the arrow points. To change one, select the connector and pick another relationship from its popover; only those that make sense for that pair are offered. Nothing stops you drawing something unusual on purpose.
Pointing at a connector highlights it faintly and marks its two ends, so you can see which one a click will select; click anywhere along its line, or on its arrowhead. When several connectors leave a shape along the same line with the same label, the label is shown once on the stretch they share. Click it to select one of them, and click again for the next.
Some other ways to draw the same thing:
- Press
⌘K, typequeue, and pressEnterto add a Queue from the palette. - Type a letter for other shapes:
DData Store,AActor,BBoundary,NNote.?lists them all. - Select a shape, press
⌘K, and choose Connect to… to wire it to another shape without the mouse.
Add a note#
Notes are for what the boxes don't say: why the queue is there, or a decision the room just made.
- Press
Nto drop a note and type into it.Enterstarts a new line;Esckeeps what you typed. - Drag the note onto the queue and hold it there until it docks. It collapses to a small chip on the shape, and clicking the chip opens the note. You can dock a note on a connector the same way.
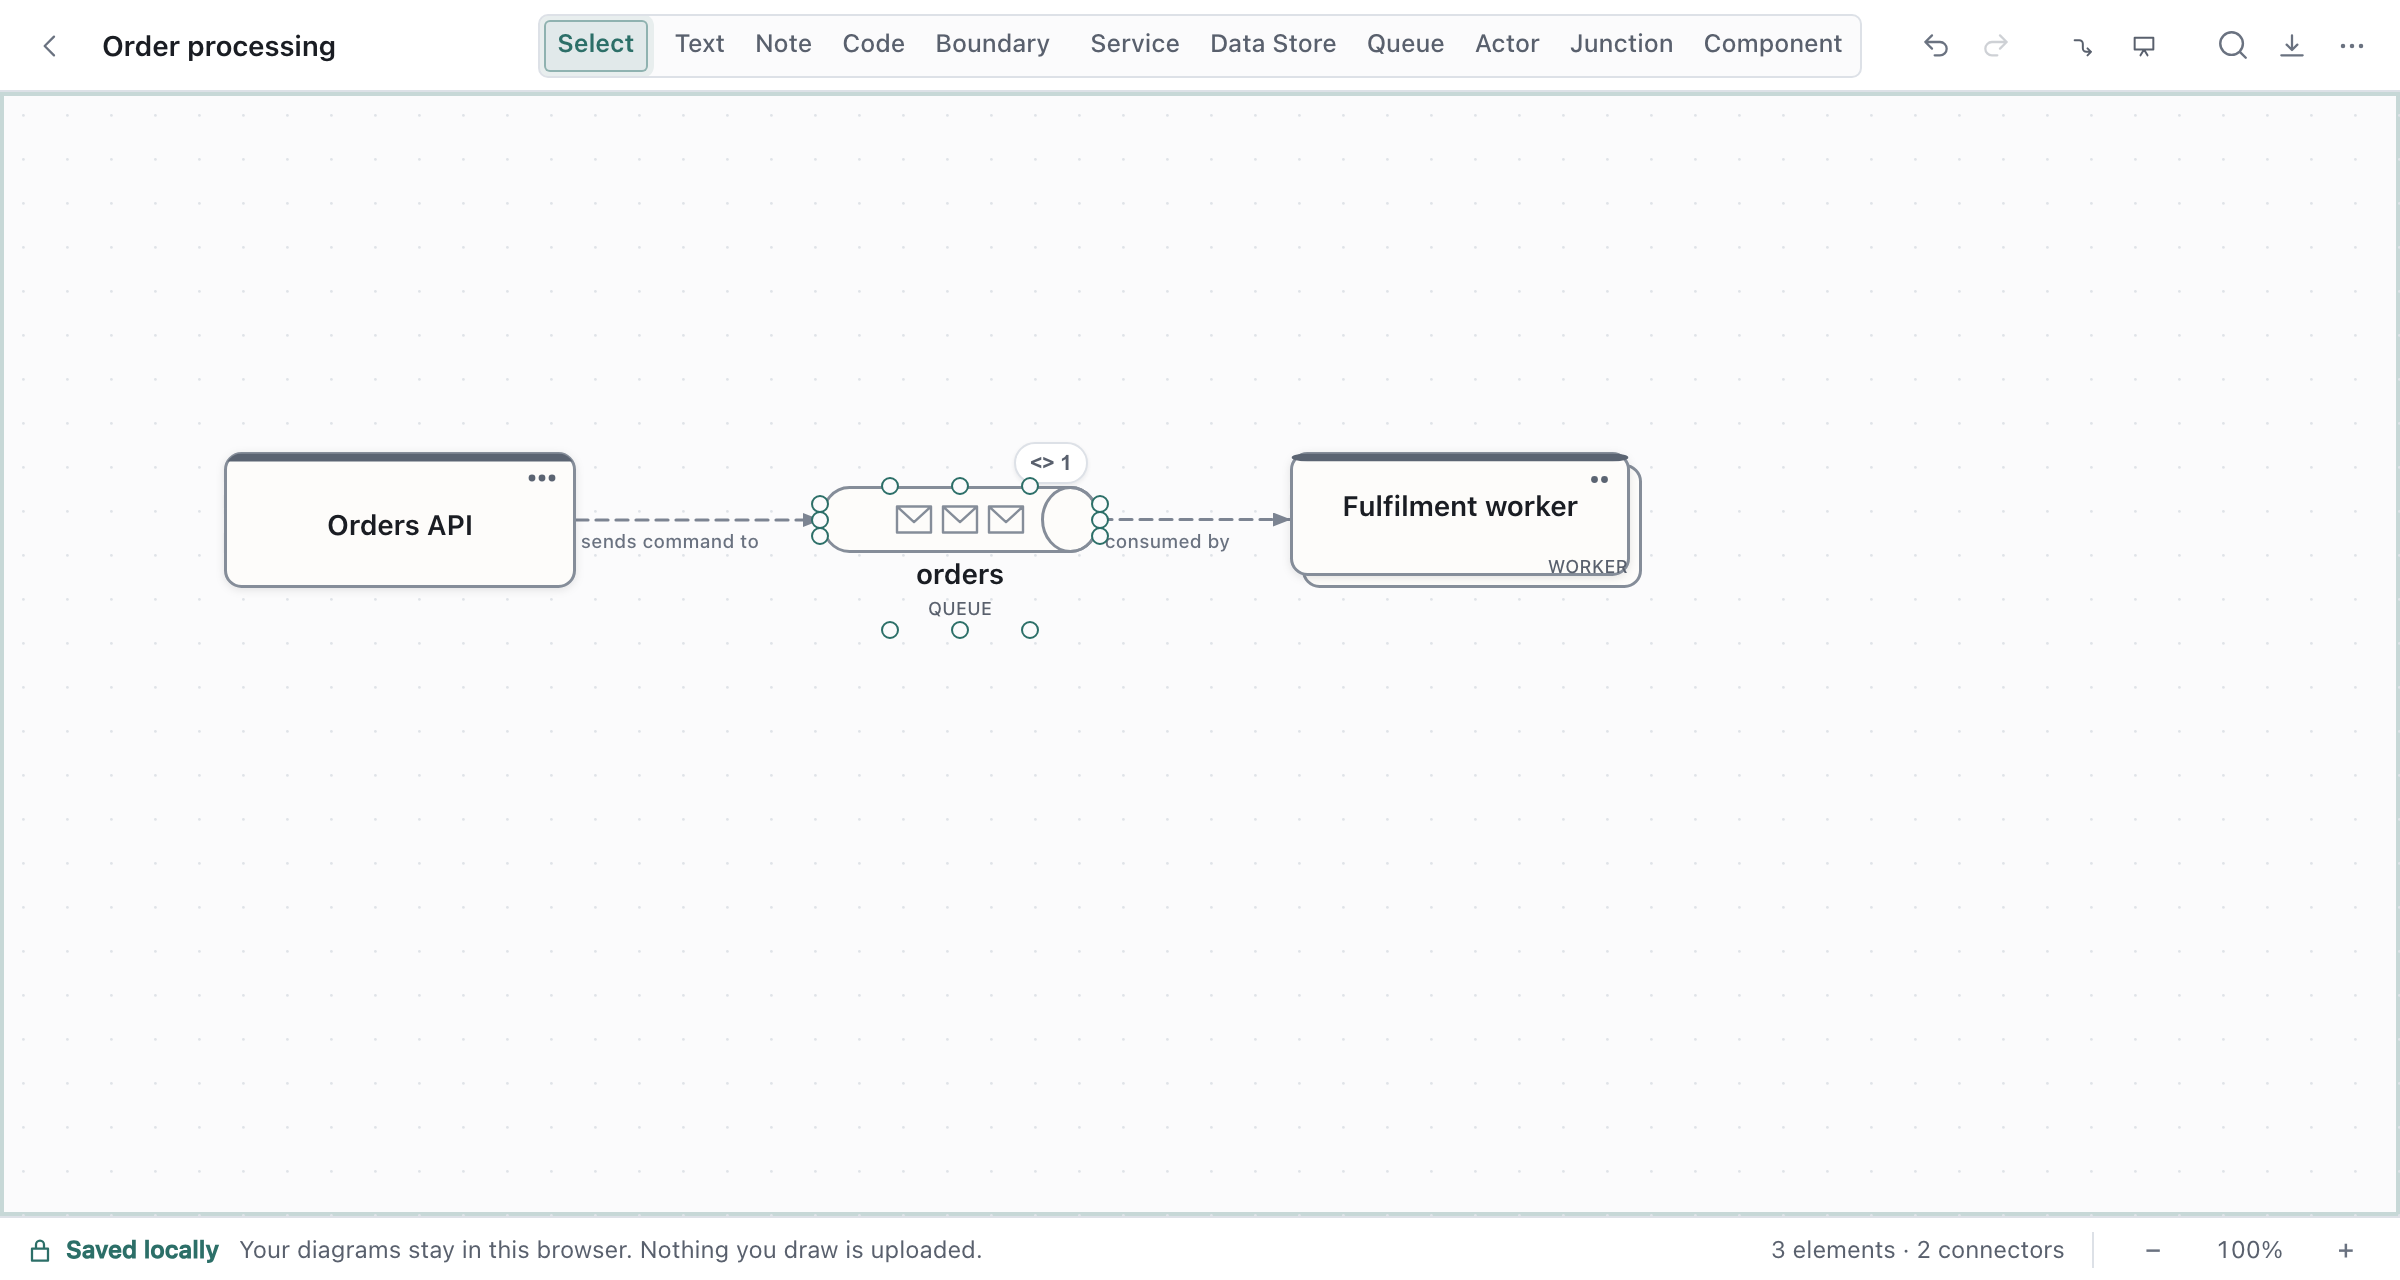
Or right-click a shape and choose Add Note, which creates one already attached.
Draw a boundary#
A boundary is a frame around shapes that belong to the same scope. Select some shapes and press ⌘G
to put a boundary around them, or press B to draw an empty one. A shape dragged into a boundary
becomes part of it. When you move, copy or delete a boundary, the shapes inside go with it.
Draft Canvas never moves a shape into or out of a boundary just because the two overlap.
Choose a boundary's kind in the bar that appears when you select it. Each kind has its own outline and header, so you can tell kinds apart without reading the labels:
| Kind | Use it for | How it looks |
|---|---|---|
| Boundary | Any frame, with no particular meaning | Dashed outline, name only |
| Group | Shapes that go together for this explanation | Dotted outline, quiet name |
| System | What sits inside one software system | Solid outline, window mark |
| Domain | Shapes that share a domain responsibility | Dashed outline, name on a corner tab |
| Network | What sits within one network scope | Dash-dot outline, connected-nodes mark |
| Deployment | What runs in one runtime or hosting scope | Solid outline, cube mark, ruled header |
These kinds describe your diagram. They don't enforce anything: a Network boundary doesn't make anything secure, and a Deployment boundary doesn't have to be one machine.
The name is the boundary's own. The kind appears after it in small capitals, and is hidden when the
name needs the room. To rename a boundary, double-click its name or press Enter.
Use the colour swatch in the same bar to colour a boundary. The colour applies to the outline and the kind mark, and tints the inside slightly, so the shapes inside stay easy to read. If you change the kind later, the name, colour, contents and connectors stay as they were.
Present a flow#
A flow is a numbered path through connectors. It's how you say "first this happens, then this".
Click the connector from
Orders APItoorders. Its popover opens, with an Add to flow tab at the top. Click it. That starts a new flow with this connector as step 1 and opens the Flows panel with the name selected, so typePlace an orderand pressEnter.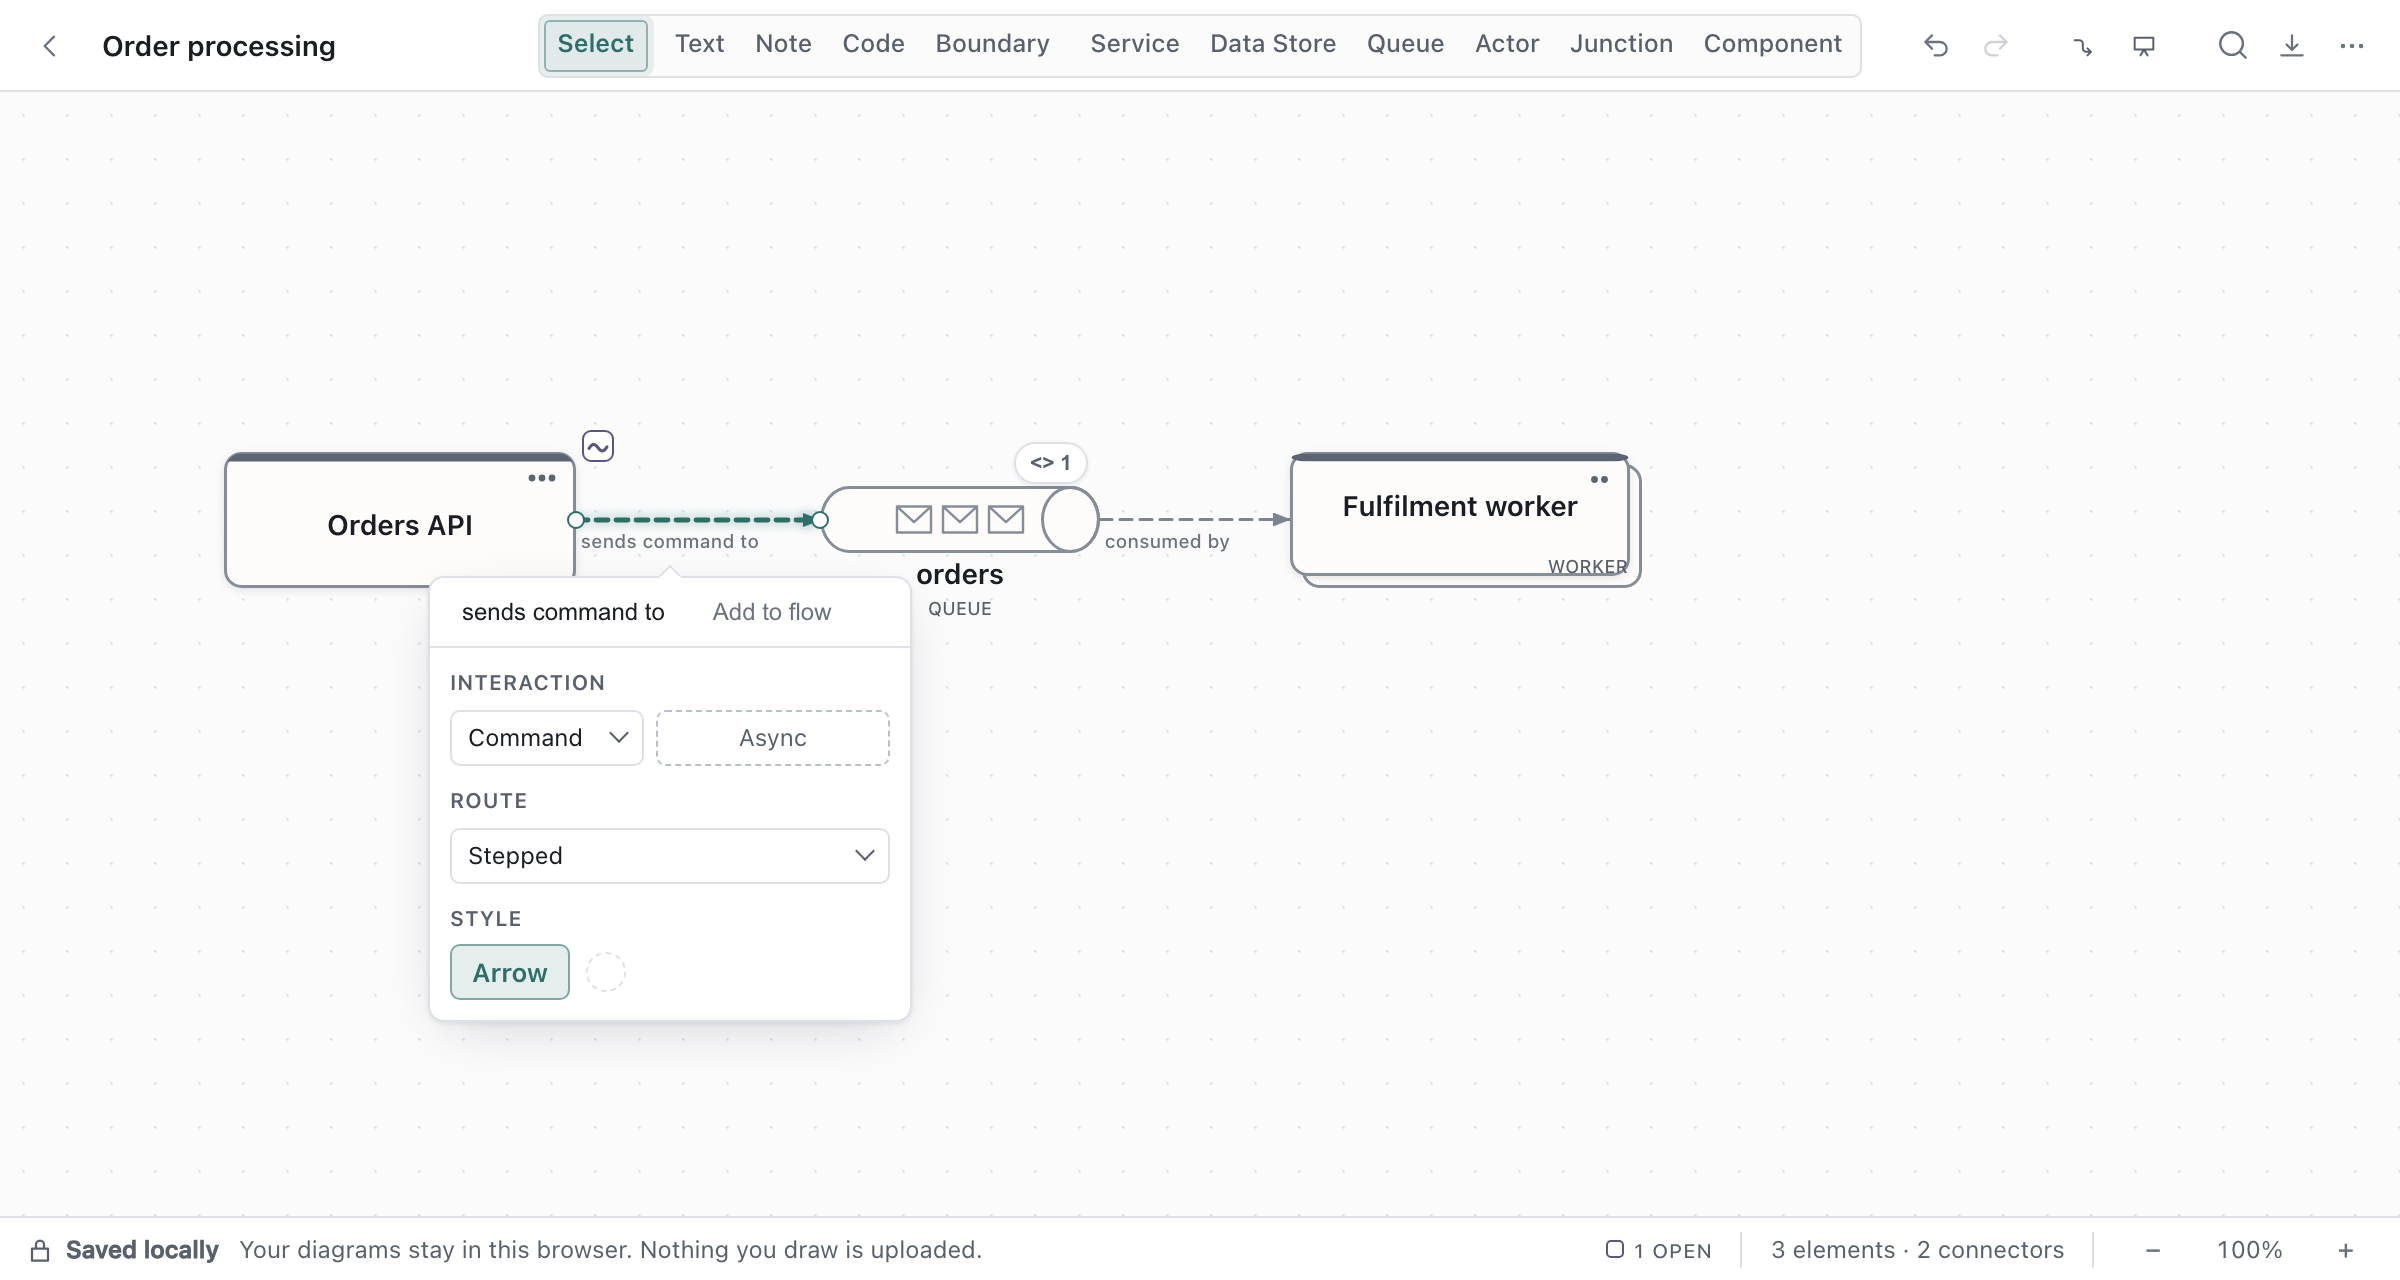
Click the next connector, from the queue to the worker, and choose Add to Place an order in the same place. It becomes step 2.
The Flows panel (the Flows button in the toolbar, or
F) lists the steps. Use it to reorder, rename, or remove them.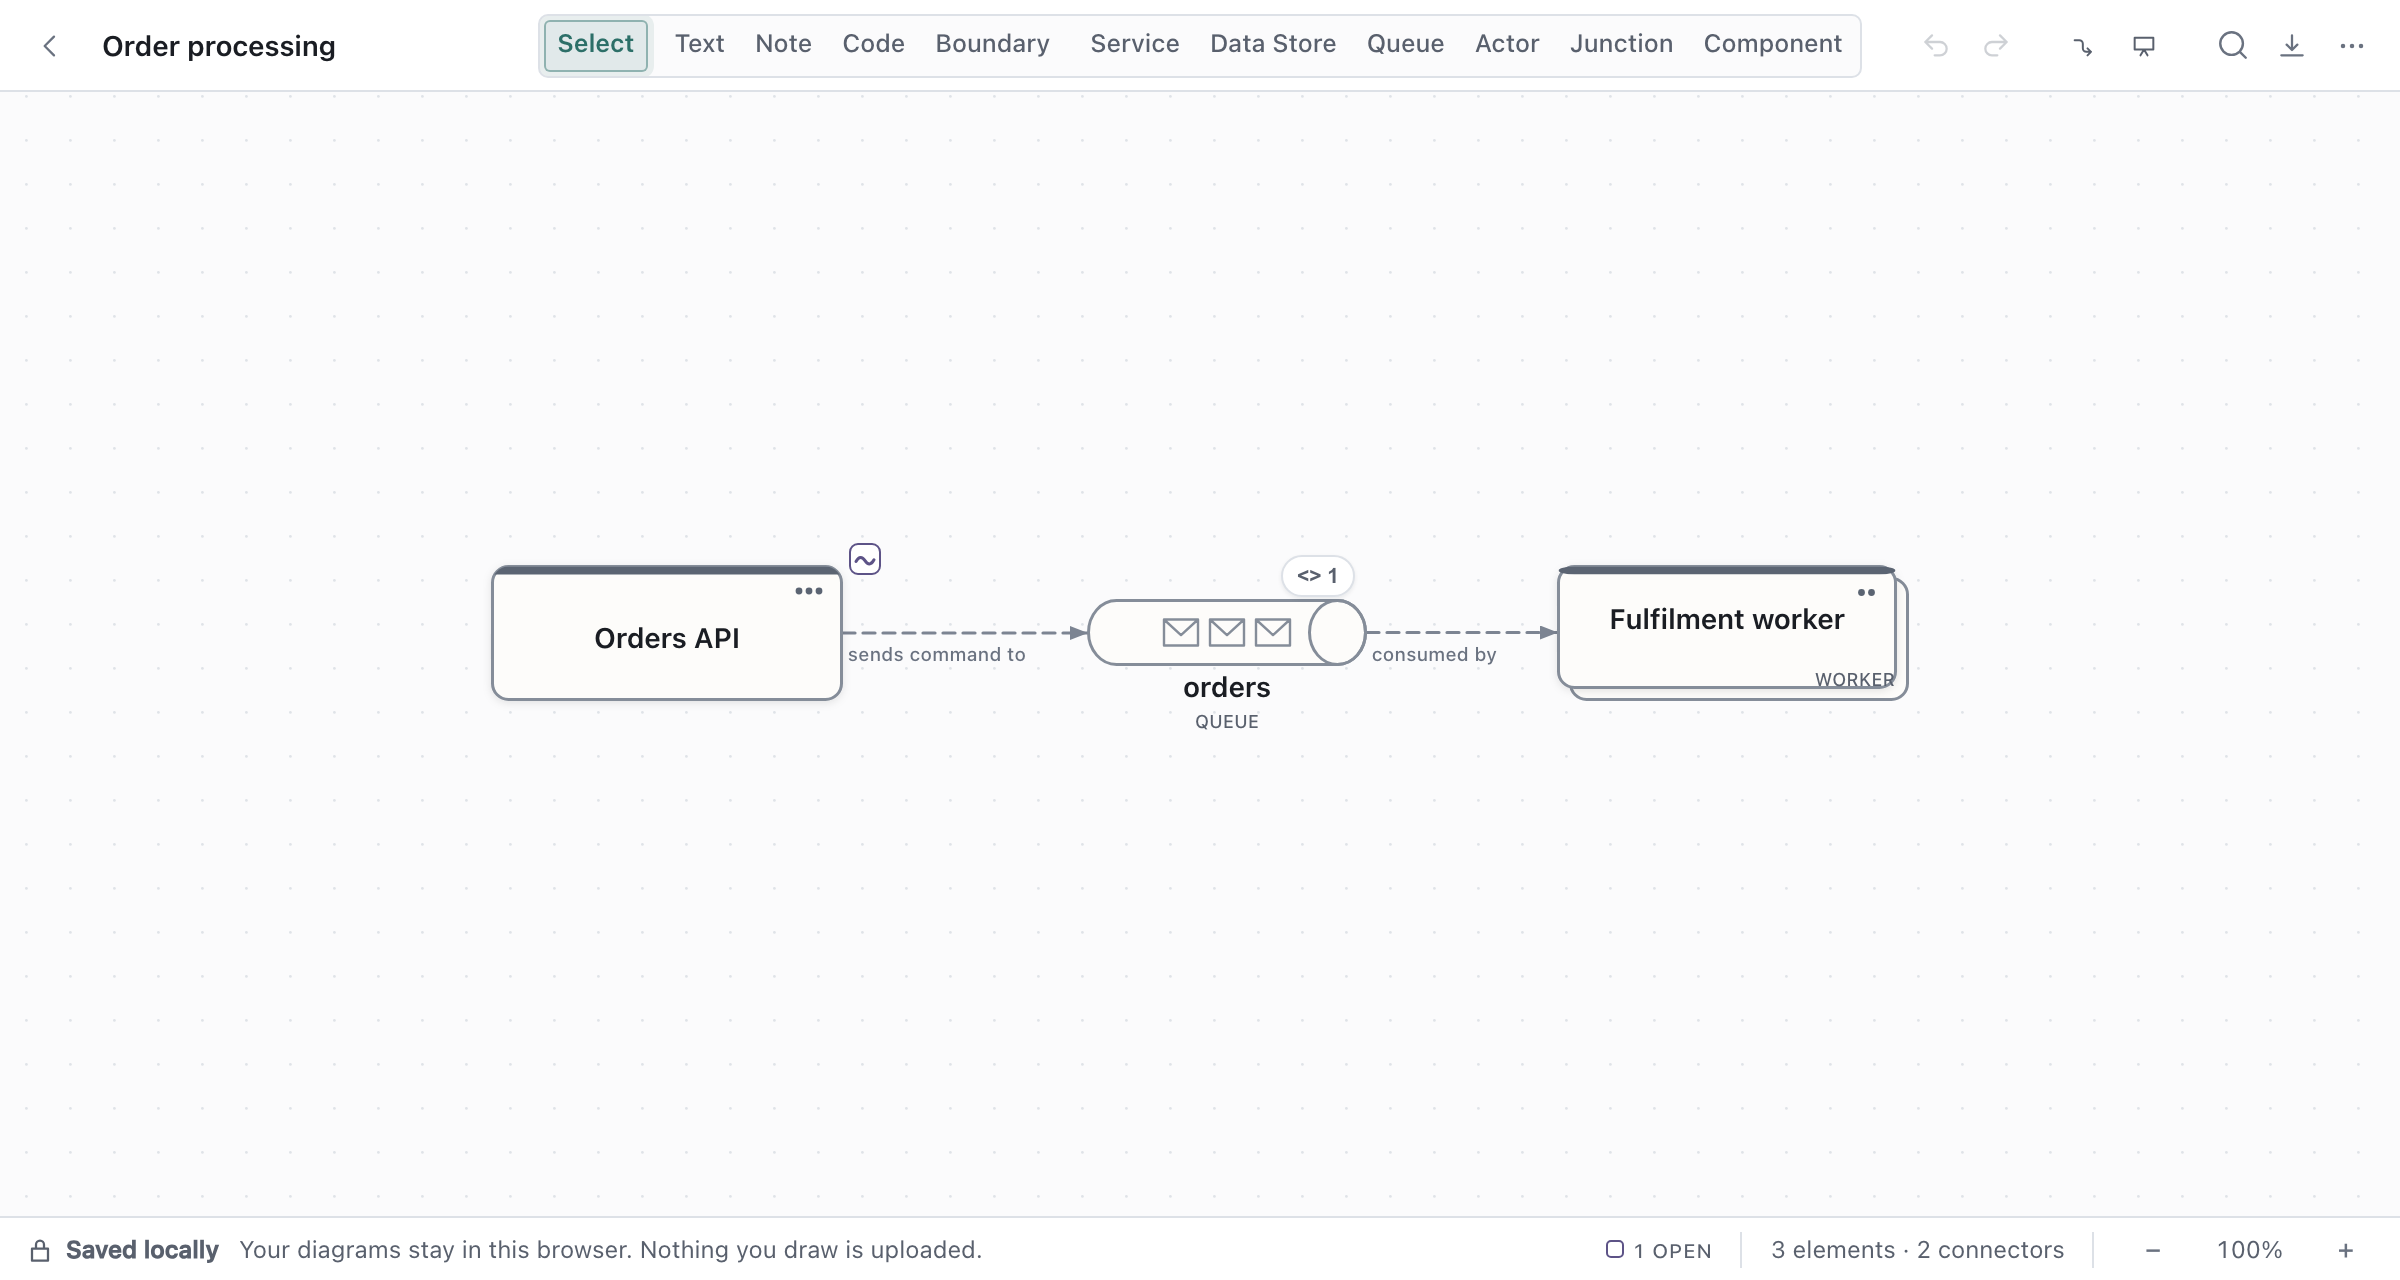
Click Present in the toolbar. The editor gets out of the way and the flow opens: its title beside the whole path, framed with the rest of the diagram quietly around it. Press
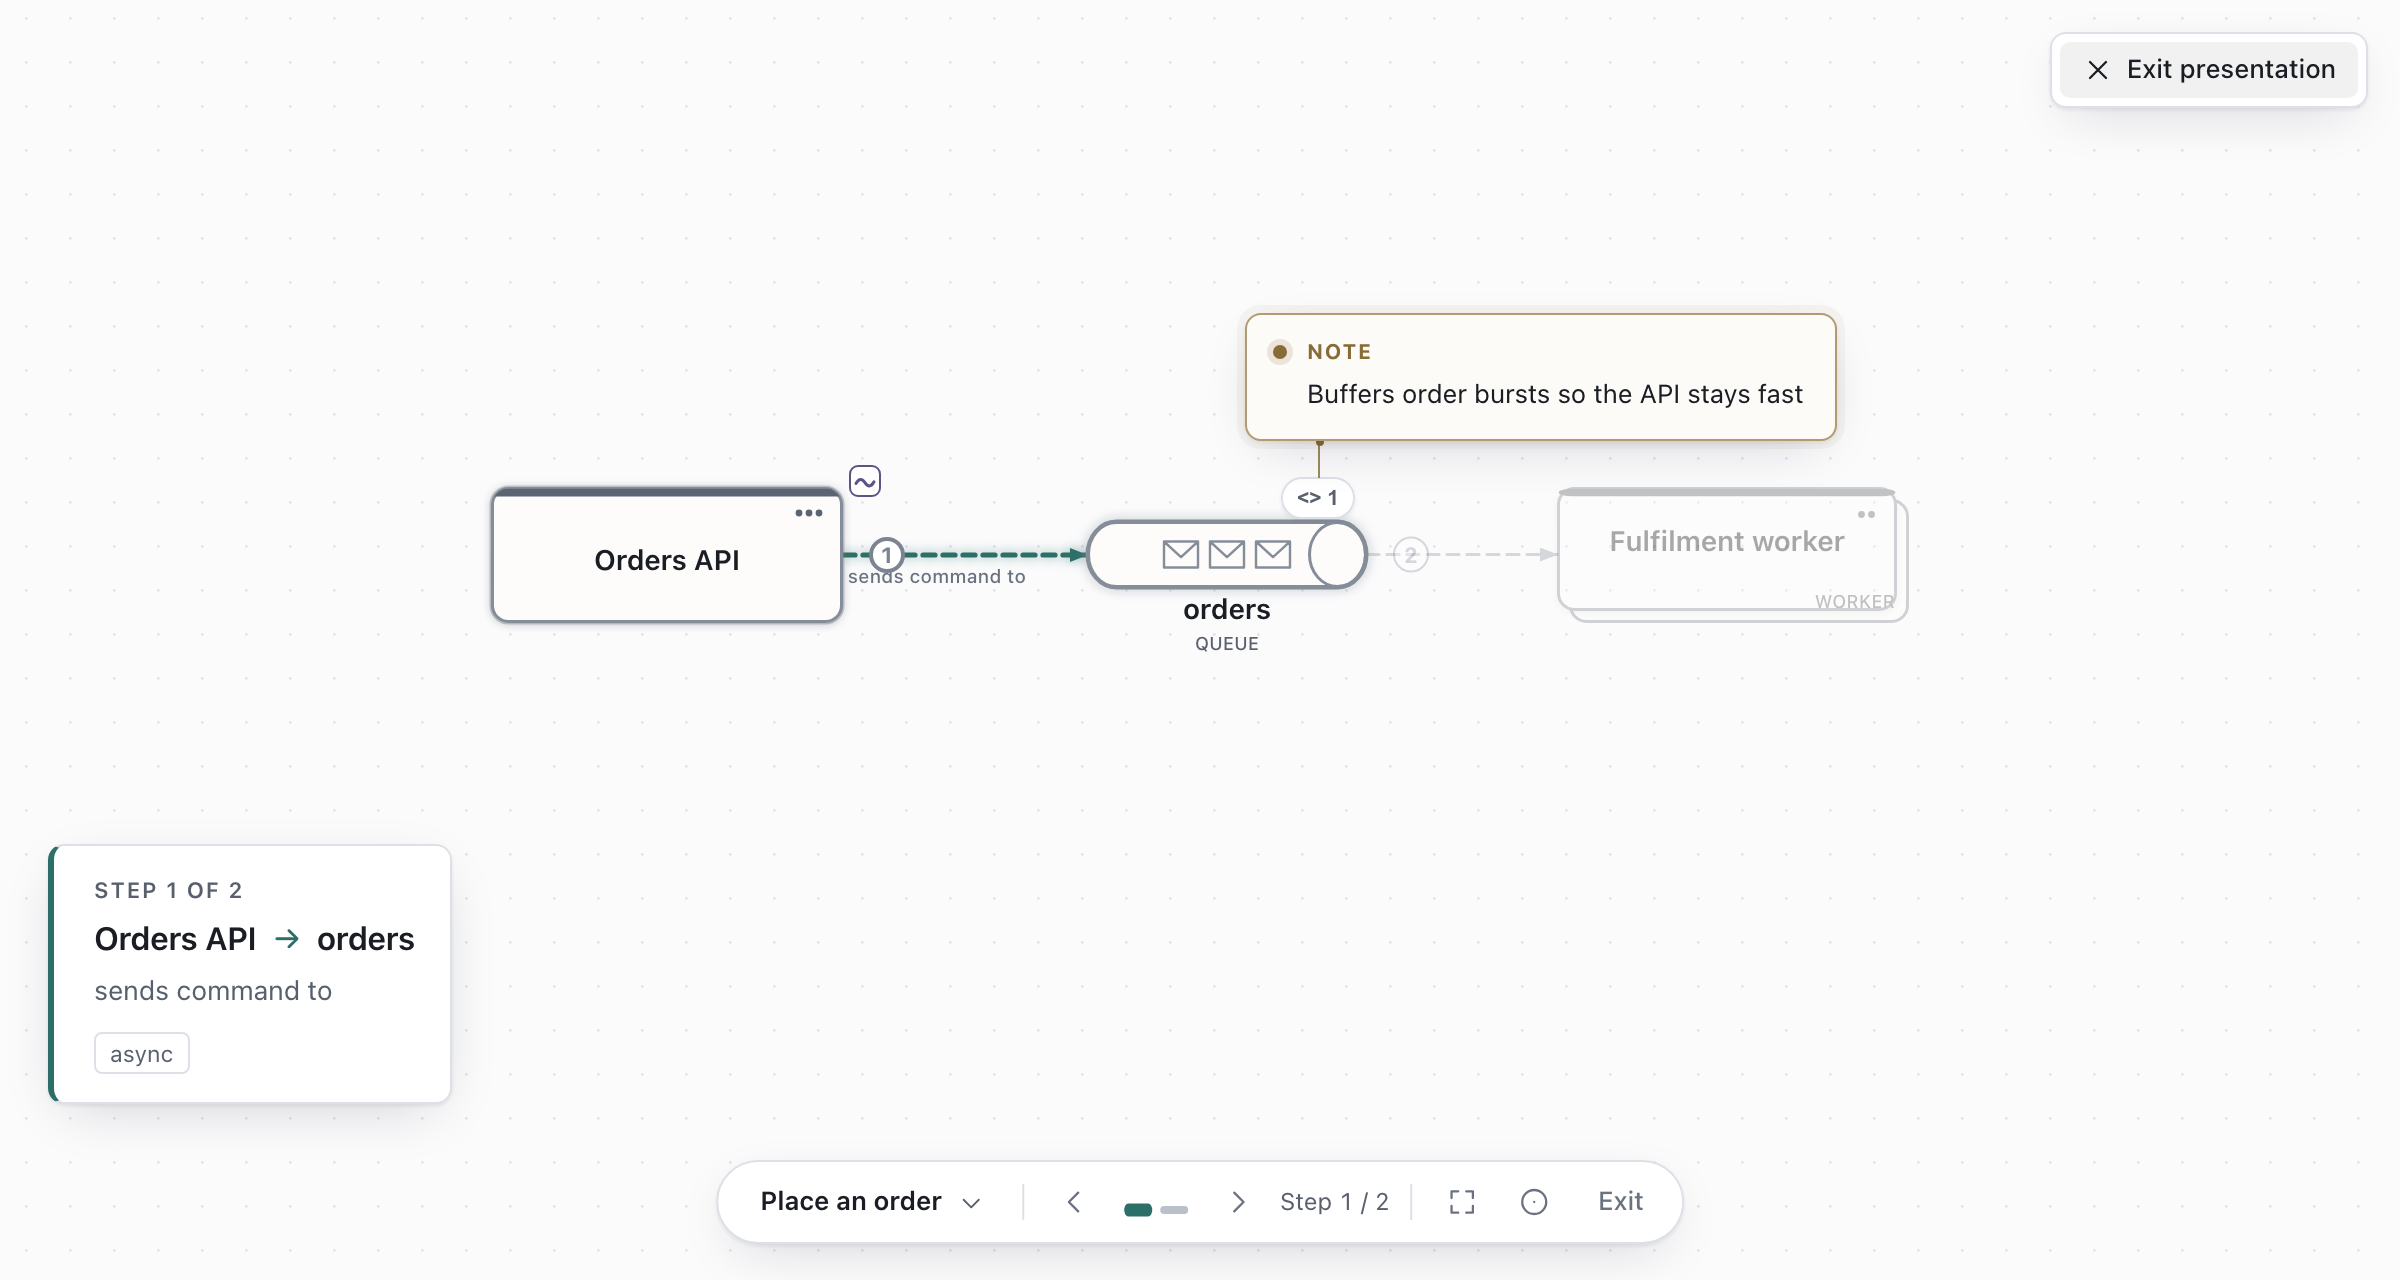
→orSpaceto begin. Each press tells one step: a signal travels the connector from where the interaction starts to where it arrives, the destination lights up, and a caption in the corner names the two shapes and what the step says. Then everything is still, so you can talk.←goes back, and after the last step the flow closes on its whole path, with Replay and the next flow a click away.Escreturns to editing, to the same view and the same selection you left.⌘Enterdoes the same as the button.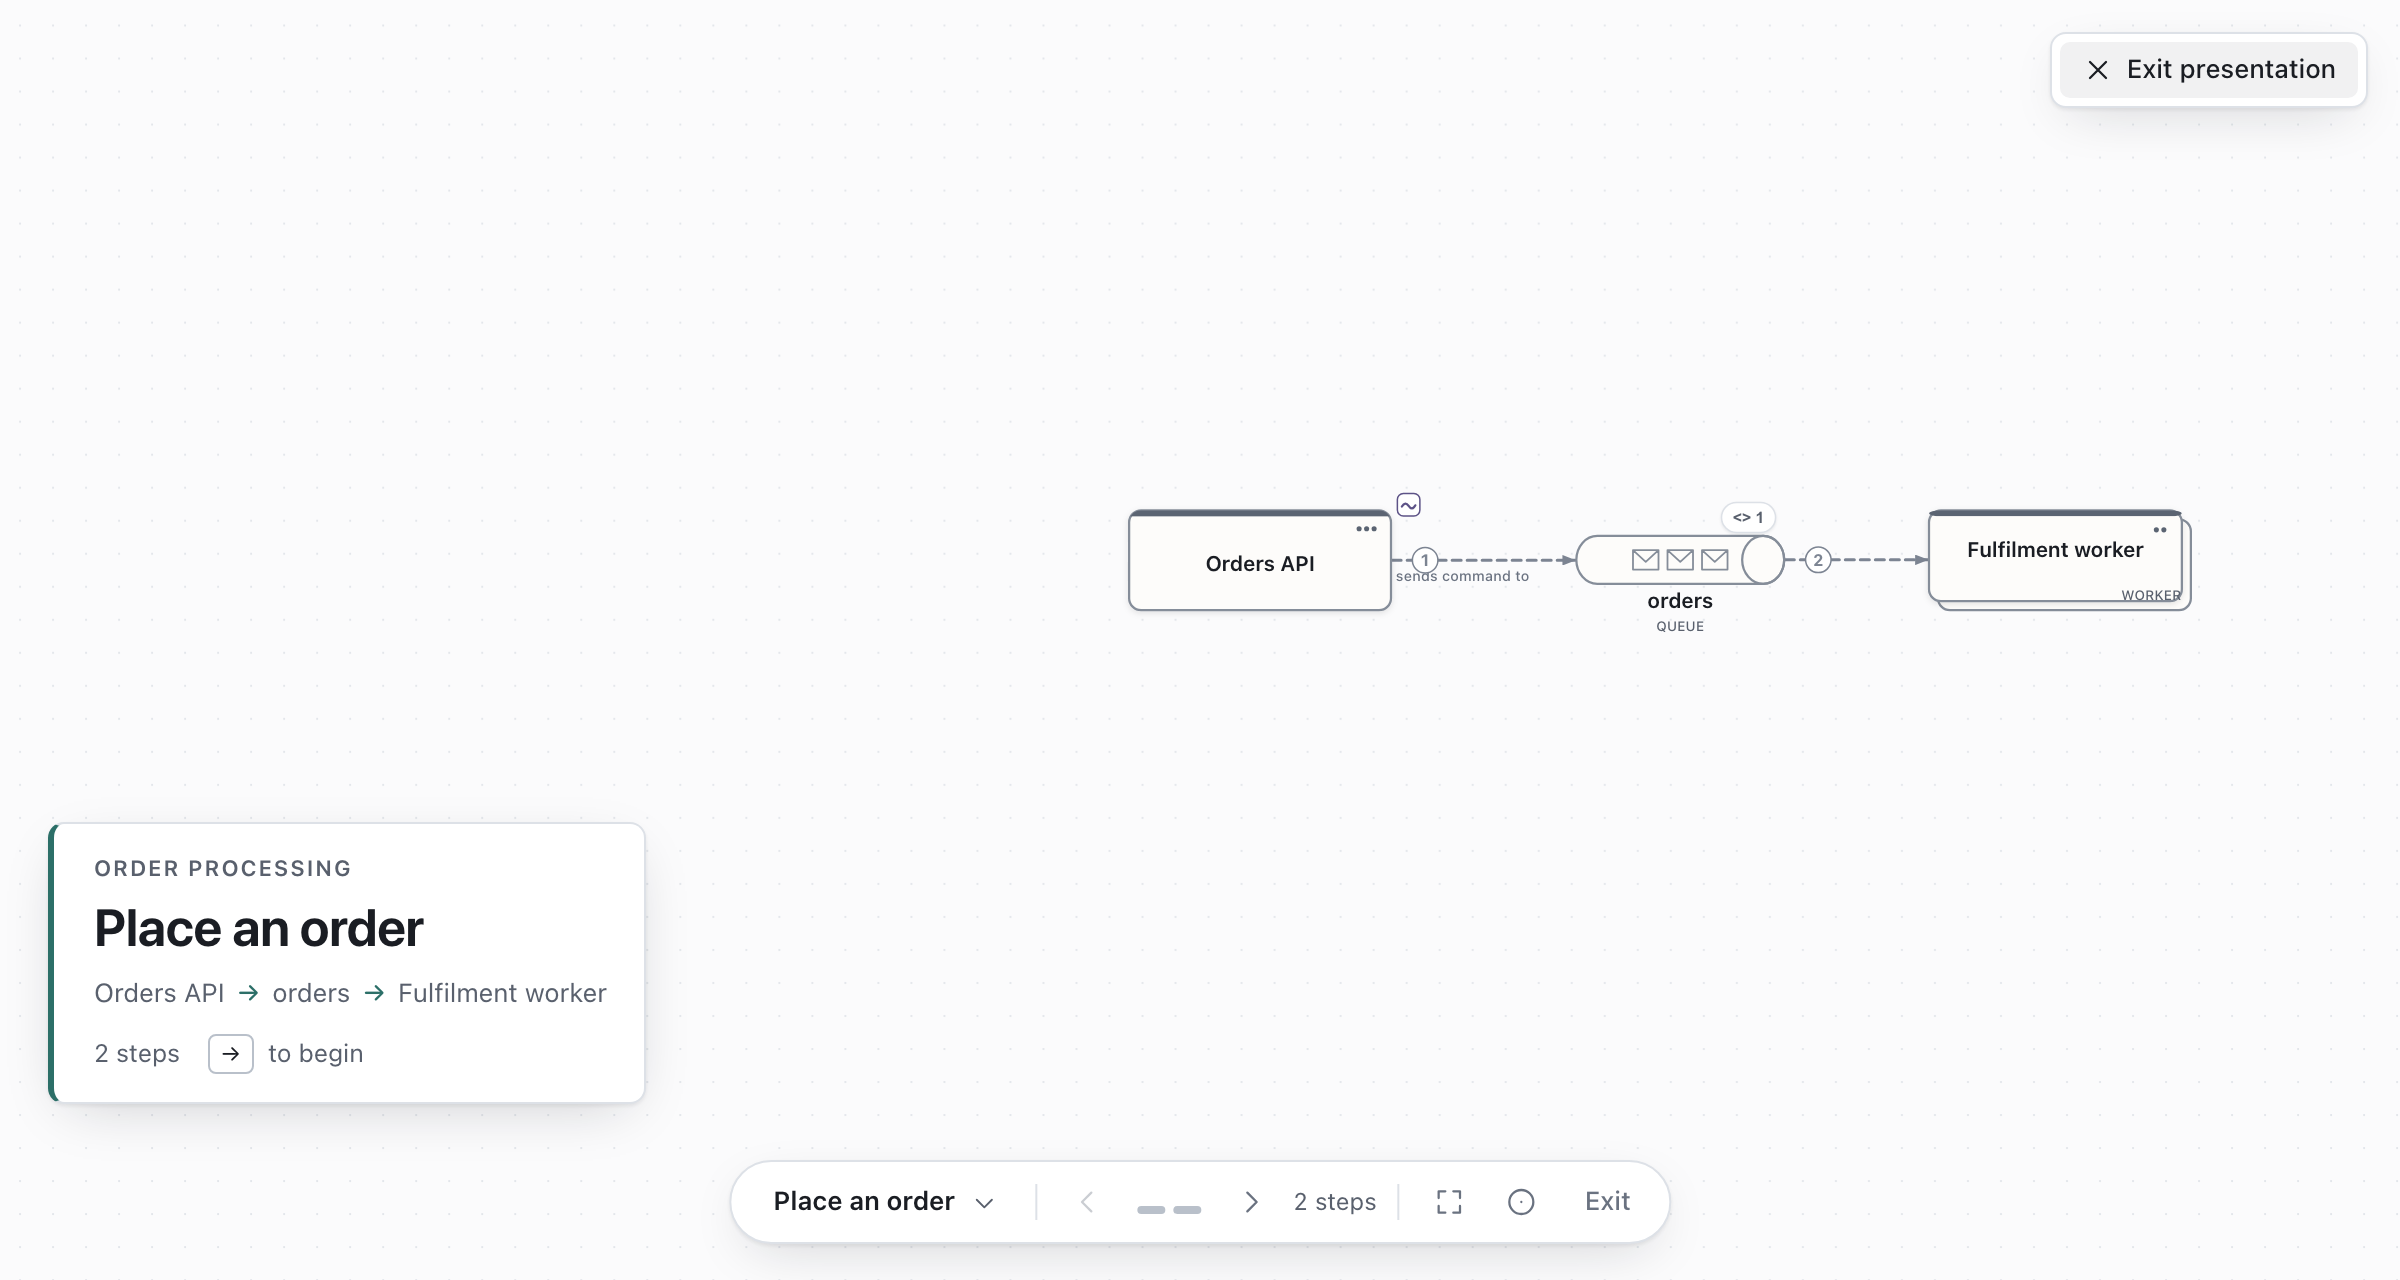
While a step is showing, the notes attached to what it shows appear beside it. The note on the queue appears when the flow first reaches the queue.
The camera follows the story rather than each shape: it holds still while the next step already
reads, slides a little when it has to, and only recomposes for a long handoff. Pan or zoom by hand
whenever you like; Re-centre (R) hands the camera back. Overview (O) pulls back to the
whole flow without losing your place, and the pointer (P) is a soft ring that follows your cursor
for pointing at things.
If you have more than one flow, Draft Canvas asks Present which flow? first — and you can change
your mind later without stopping. The bar names the flow you are in and where it sits (Place an order · Flow 2 of 4); click it for the full list, or press Shift+→ and Shift+← to move to the
next and previous flow. On the last step of a flow, the button to the right of the title names the
one that follows, so the hand-off is there when you need it.
Export it#
Press ⌘⇧E, or open Export in the toolbar.
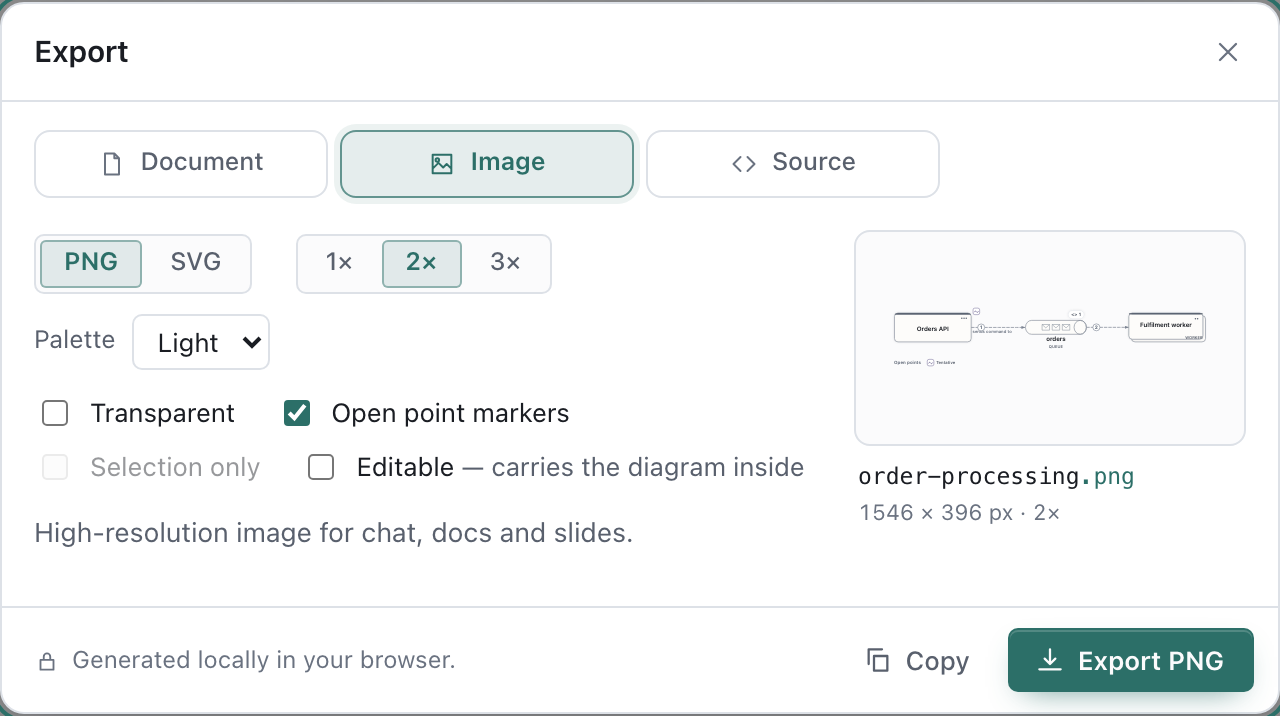
- Image → PNG for a slide or a chat message. Choose the Light palette for a document, or tick Transparent to lay it over your own background.
- Document → Editable saves a
.draftcanvasfile you can reopen later, send to someone, or commit to a repository. - Source turns your flow into a Mermaid or PlantUML sequence diagram, as plain text you can paste into a README or wiki.
The saving guide covers each option, including encrypted exports.
Where next#
- Skip the blank page. Press
⌘Kand typemicroservices,cqrsorsaga: a starter fills the canvas with a composed architecture you edit like anything else. - Show more or less detail. Explain a system at different levels uses Look inside to keep the overview clean and draw the detail one level down.
- Go faster. Keyboard shortcuts and the command palette.
- Say what is still open. Mark what is still open attaches a tentative, awaiting-input or parked point to a shape or connector, for the next conversation to pick up.